I’ll admit to being a bit girly in my love of heart-shaped things. I have some heart-shaped ramekins. I have a heart-shaped silicon muffin tin. I have heart-shaped cookie cutters. Now I have heart-shaped mini cake pans – made from soup cans.
I thought of this idea a few weeks ago but was lazy in actually getting to it because I thought I might not have the necessary equipment. I envisioned vices, sharp edges, tin foil, marbles – I really imagined a variety of scenarios that seemed a bit out of reach for me; however, this proved WAY easier than I thought. It’s so simple: use your hands. My creative juices were definitely flowing this weekend and so after trying a multitude of sketchy and dangerous tactics (e.g. big knife, blade up, soup can between my knees, and a tea towel) I was happy to discover than my good ol’ 10 fingers did a marvelous job of accomplishing a heart shaped can.
You can use a variety of sizes – I made some out of normal 14.5 oz cans, and some out of 29 oz cans. Both worked really well, and the bigger ones give you a bit more flexibility when decorating (and they’re great for sharing with someone else!).
Step 1:
Pick the right can. It cannot be the newfangled can with a weird bottom – it has to have the same kind of bottom as the top (so you can remove it with a can opener). Usually cheaper brands use this kind of can – I found some of my diced tomatoes and coconut milk cans were the best.

Step 2:
Cut off both the top and the bottom of the can. I invested in a nifty safe cut can opener as to avoid sharp edges – it makes a very clean (smooth) cut. I also thoroughly washed the cans at this point.

Step 3:
By pressing down on a hard surface (like your kitchen counter), flatten the sides slightly to form a point on one side of the can. I tended to do this on the seam of the can (although I’m fairly sure it makes no difference).
Step 4:
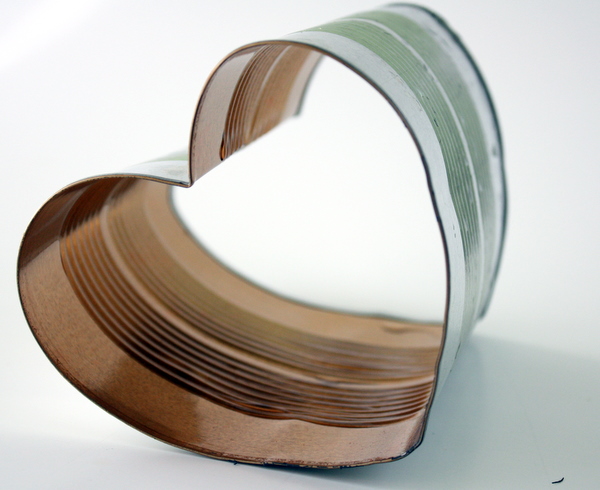
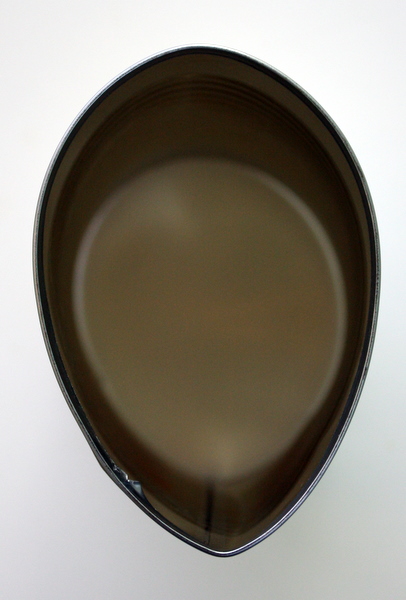
This is the most complicated part. Position your hands like the picture below, with your hands cupping the can. I started by gently pressing down with my fingertips touching, in a line, and making a faint – but as straight as possible – line down the can. At that point I took some pliers and made a slight V on the edges (which are harder to bend precisely), before really using my hands to deepen the V into a heart.

Step 5:
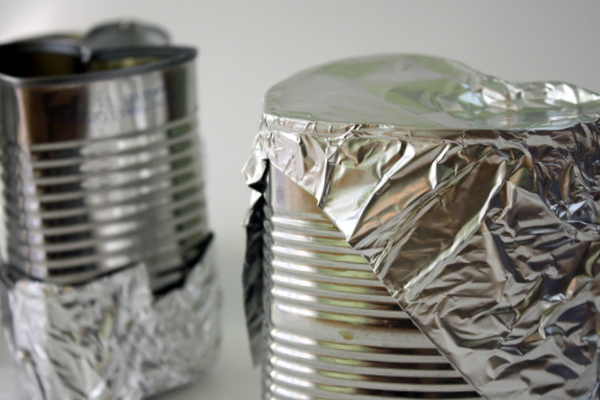
Tightly cover the bottom of each can with foil. I was skeptical, but it worked great for me.
Step 6:
Make any cake or cupcake recipe, pour it into your buttered and floured cans (1/2 or 2/3 up is plenty), and bake until a cake tester comes out clean! It took much longer than I anticipated for mine – for which I’ll post the recipe soon! To get them out easily, just take the foil off, run a butter knife around the edges, and let them slide out the bottom. Don’t worry about any mutations in the cans, they can be easily hidden with frosting.

This is so clever! I never would have thought to do that with a can…very sustainable and crafty of you!
What a wonderful idea! This is such a creative way to bake and recycle 😀
Cheers
Choc Chip Uru
Latest: Fresh Fruit Tart